
The Perfect Chicken Cut
Choosing the right chicken pieces
While it is a personal choice you have to make, the type of chicken piece you end up using isn’t the most significant factor when it comes to achieving a great fried chicken. So, don’t stress over it. Use what you and your family prefer, and be mindful that you’ll get the best flavor out of free-range, locally-sourced chickens. If your local sources also offer the additional cut of tenders (which is fried at its best!), don’t hesitate incorporating it into your meal as well. After all, the most important ingredient in any dish is the love you infuse into it–so share your love with everyone who gets to savor it.
When it comes to selecting chicken pieces for frying, you have two options: dark meat (thighs and drumsticks)–which is juicer, meatier and super flavorful–or white meat (breast and wings)–which is leaner, larger and lighter in color. Most people prefer a medium-ratio combination of both; others, a preference of only dark or only white meat. One thing is clear, the quality of the chicken you use will make all the difference. We recommend free-range chicken pieces from a local trusted source. Making it a commitment to choose only the best ingredients will pay off in your final result.
Importance of marinating the chicken
This is a very versatile recipe by the way – ideal for any sort of fried chicken – wings, drumsticks, boneless chicken or Turkey breast fillets but adjust the temperature and cooking time. Go low and slow when frying (but without deep frying) the boneless fillets at 160 degrees Celsius for 8 minutes or 150 degrees for 12 minutes creates a perfectly succulent fillet. It will also make enough deliciously crispy fried chicken for 10 servings. However, never just add more chicken (or adjust the recipe, halving or doubling it) without increasing the oil to 5 liters and/or using a bigger pot. Never add more than 900-1 kilogram of chicken or large pieces of chicken and 1500 grams chicken wings to the recipe otherwise, the oil will bubble over if you do not add more oil and the temperature will drop down too low (it should maintain a constant 165 degrees Celsius).
You should marinate (buttermilk or brine) the chicken for at least 5 hours but 12 hours will give you real results. Even 24 hours work well too. The longer the chicken is in the marinade the tastier and juicier it will be. Not marinating the chicken is sacrilege. The aromatics also get to do its work and flavor the chicken with all that yumminess as well. Mix 1 cup buttermilk, 2 cups Cultured Buttermilk or 2 cups regular milk, 2 tablespoons vinegar and 2 teaspoons salt well together and let the chicken pieces sit in it for at least 5 – 24 hours. Brew your own Cultured Buttermilk by mixing 2 cups full cream milk with 2 tablespoons buttermilk and let the mixture sit in a warm place for 24 hours.
Breading Techniques
Fried chicken is tricky. Sure, the end results are delicious but the journey to get there can be a bit of a nightmare. It doesn’t have to be difficult, though. There are several techniques cooks use to make their fried chicken insanely crispy. Here we share our insider secrets: Don’t be afraid to use water. Some people swear that using milk will help with browning but we prefer water. “The proteins in milk can form a crust on the outside of the meat, making the meat tender. When you coat the chicken with water, this helps to cook the crust into that legendary southern-style crunch.” The rest of the recipe isn’t too abnormal for a classic fried chicken but the water trick is an old-school secret.
To feather your chicken (in a sort of culinary striptease), “start by making a slice through the skin near one end of the drumstick. Using kitchen shears, cut along the bone and push the skin and tendons down toward the cut end, forming a small drumstick lollipop. Pull the meat down off the bone to expose the tendons, and cut them. Push the meat back to its original position.” You do these steps because you want the end result to look like a “clean lollipop.” Preheat oil in a pot over medium heat. Deep-fry the lollipops until golden and crispy, about 2 minutes. Make sure to let them drain on a wire rack set in a rimmed baking sheet before serving because they will be a bit on the oily side.
Creating a flavorful breading mixture
The structure of the breading in fried chicken depends largely also on how “tremendous” the flour is. If the starch has large granules, then there are many spaces between them when the flour is mixed with water (or liquid) and becomes more loose from the static electricity of the starch (you can see this if you sift the flour and hear hissing). And because specific threads are extremely tight fabrics, the mixture can be wonderfully broken by bubbles in the dough and baked omelets. In essence, you are left with wonderfully crispy air crusts! Therefore, water or liquor goes into breading. And to get even more potatoes in a small volume. However, you can still put dry spices one by one and mix in the flour until it becomes even more like crumbles, then roll the chicken!
One of the secrets of the famous crunchy outer layer of fried chicken is the actual breading! Creating the perfect mixture for breading begins in the seasoning. With small quantities of added spices, the flour will become “huge” because it changes color a bit, while the taste goes up many more times! I suggest you add the spices one by one to get the desired taste and color of the mixture. But yellow becomes rare because the taste and aroma of the turmeric can interfere with the other spices, and paprika is the most widespread. Black pepper should also not be missed. Protein absorbs its taste much more than starch, and even more if the grains break (that’s why freshly ground pepper has a more intense taste than the glucose-containing fine-ground).
Properly coating the chicken pieces
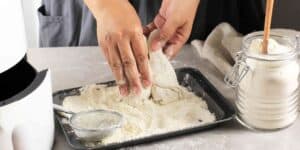
Assuming 3 lbs. of chicken wings, cut into 48 pieces (discard the wing tip and halve the remaining wing section into two parts at the joint), you will need 2 cups of all-purpose flour. To the bowl of flour, add ¾ tsp. each of the Clabber-Girl cornstarch and baking powder, 1 tsp. of pepper, and 1-1/4 tsp. of Lawry’s seasoned salt. Gently toss and mix well to evenly distribute the dry ingredients. For the wet ingredients, fill a foil pan with buttermilk. Set a rack on top, then position the marinated chicken pieces over the roasting rack to catch the drips. Allow the buttermilk to drip off the marinated chicken for 20 minutes. To create the flour breading, place a baking sheet on the work surface in between the wet and dry ingredients. Next, transfer about 8 to 10 pieces of buttermilk-dripped chicken into the seasoned flour, then gently toss to coat thoroughly. Discard the additional flour mixture. Transfer the breaded chicken to the clean baking sheet, then immediately repeat the process with the remaining chicken pieces. Allow the flour-coated chicken wings to sit for at least 20 minutes before frying. Once complete, you can fry the chicken pieces with one of the following instructions.
The no. 1 reason for not-so-crispy fried chicken is that the flour coating is, more often than it should, soggy and cakey. It’s sudden and drastic exposure to a hot frying oil that solidifies the starches in the flour, thereby transforming it into a sturdy crust. The thick, dry dredge by way of seasoned flour mixture must cling vigorously to the chicken, as if bare-knuckling it. To achieve this, the chicken pieces have to go through a four-step process that we describe in the following section.
Double breading for extra crispiness
I’ll admit, it felt like a little too much when I first read this method. It sounds a little overkill, and I’m not sure I would have ventured this far out on my own. But one look at those parched and clumpy re-dried chicken pieces on the wire rack let me know that I was in for an auspicious surprise at dinner. And sure enough, the finishing touch produced the crunchiest, most delectable fried chicken I’d ever had. Like biscuit levels of crispy, like those happy “Honey, it’s fahhhhnd!” levels of crispy. It makes sense when you think about it though. The breadcrumbs’ job is to soak up all the doneness from that chicken—don’t leave that to chance with just one pass.
This is a game-changing trick I picked up: when you’re breading, go through the process twice. First, you’ll dip your chicken pieces in the flour, then the egg and last the breadcrumbs, letting the pieces dry on a wire rack for 10 minutes. Next, you’ll re-dredge the chicken pieces in the breadcrumbs, pressing down to ensure that they cling tightly to the chicken.
Frying Tips and Tricks
If you don’t already have one, get an inexpensive fry thermometer on your next trip to the market. The temperature of the oil is crucial for successful frying, and you shouldn’t rely on the “oil is ready when you drop a piece of bread into it and it sizzles” technique (if the temperature of the oil is not hot enough, the bread or, in this case, breadcrumb, will absorb the oil instead of frying in it). I usually start heating my oil then head over to my breading station to start dredging my chicken. A 10-minute head start on the oil over the chicken will ensure oil is at temperature when it’s time to fry. A pot clip is also helpful – look for deep fry thermometers with a pot clip for easy removal.
Proper frying will produce a juicy chicken and a super-crispy crust. Always use clean, fresh oil at the proper temperature. Since dark meat takes longer to cook than white, make sure leg and thigh pieces are slightly submerged in the oil before adding the white pieces. There are few tips and tricks that lead to huge results when it comes to proper frying. The best practice for deep frying chicken is to set yourself up three stations – one for the chicken (seasoned), one for the egg wash and one for the breading. Use one hand for the liquid and one for the dry if you can. Keeping dry and wet hands separate is important for a clean kitchen!
Selecting the right oil for frying
Just as important as the oil temperature, if not more so, is the chicken’s internal temperature. This is roughly equivalent to deep-frying the chicken. You’re literally cooking the chicken from the inside out. As the chicken spends time in the hot fat, the heat moves deep into the center, causing the temperature to rise only 2 or 3 degrees every minute. This long, slow journey is referred to as temperature blending. As it diffuses through the meat, it sets the protein in a creamy matrix and cooks the collagen until it is soft and chewy, about 160 to 165 degrees F. The classic southern buttermilk marinade helps in this process. High-acid buttermilk and a bit of salt have an enzyme effect, breaking down the muscle fibers so they soften and become tender as they cool.
One of the most important steps in frying chicken is selecting the right oil. When it comes to frying, I always use peanut oil. It has a relatively high smoke point, works well under high temperatures and imparts very little in the way of flavor. Plain oils, such as peanut or vegetable, have a clean taste and work with a wide variety of ingredients. Olive oil and nut oils, for example, would not have worked in the South, because they are significantly more expensive and have strong flavors that could compete with the taste of the food being prepared. Plus, their relatively low smoke point wouldn’t handle the high heat required for frying.
Maintaining the oil temperature
With an electric deep fryer, you can set the given temperature and check to see if the fryer is cycling back and forth, i.e., the light that indicates the heating element is going on and off in response to changing the temperature. If not, adjust the dial until the light comes on. While it’s true that overcooking shortcomings a somewhat less crispy and golden crust, in reality, the flaws are rarely so noticeable. However, if the oil becomes significantly too hot, the fat will burn off and turn bitter and acrid, a flavor that will absolutely ruin the chicken. A good way to prevent this, especially without using a thermometer, is to watch the diya throughout the cooking process, listening to the sizzle of the chicken, and to follow your instincts. If you feel the oil is getting too hot, turn down the heat for a few minutes, up the heat slightly if it doesn’t appear to be frying rapidly enough.
If you have a thermometer, you can monitor the temperature in real time. If you don’t, use your eyes and instincts to check the heat every once in a while. Maybe you started frying when the oil was at the right temperature, but you’re also adding more raw chicken to fry the chicken in batches, correct? If so, the temperature is going to drop once those cold chicken pieces hit the oil. Adjust the heat on your stove as needed to correct the temperature and remember to check the thermometer or guess at the heat level every 1-2 minutes. You can prevent the oil temperature from changing too much by predetermining or knowing ahead of time at which temperature setting to keep your stove dial at a consistent temperature. Use a good corded, deep-frying/candy thermometer in a heavy pot big enough to hold all the joints in a single layer, so they’re not on top of one another. A deep-fry thermometer helps maintain the oil temperature and not get so hot that the chicken burns and smokes.
Drainage and resting after frying
Insert a cooling rack over a baking sheet (or two) to let the oil drip away from fried fabulousness. A rack or any sort of slightly ‘elevated’ resting place will allow a good amount of the oil to separate from your food without submerging the base of the product in discarded oil. Placing your soon-to-be oily treat on plain-old, ho-hum parchment will also give it less soggy-on-the-bottom resting spot. The food will still be in contact with oil, but there’ll be enough space between it and the parchment to allow for some drainage.